A pool coating can only perform as well as the surface beneath it. That is why knowing how to choose pool primer starts with more than picking a tin labelled for swimming pools. You need to identify the pool shell, assess the existing coating if there is one, and select a primer that works with both the surface and the finish coat you plan to apply.
Primer is not a universal extra coat. In some pool-paint systems it is essential for adhesion and sealing. In others, the correct preparation and compatible topcoat are the main requirements. Applying the wrong primer can create just as many problems as skipping a necessary one, so it pays to make the decision before you buy paint.
Start with the pool surface
The first question is simple: what is the pool made from? Most painted pools are concrete, rendered masonry, fibreglass or previously coated surfaces. Each has different preparation needs and may require a different primer approach.
Bare concrete and rendered pools
New or stripped concrete pools are porous. They can absorb coatings unevenly and may contain surface dust, laitance or contaminants that interfere with adhesion. A suitable pool primer can help bind the prepared surface and provide a consistent base for the selected pool paint system.
Concrete must be properly cured, dry and prepared before priming. A surface that looks dry can still hold moisture within the slab or render, particularly after rain, cleaning or draining. Moisture-related coating failures are difficult to fix once paint has been applied, so follow the relevant technical data sheet for preparation, drying and application conditions.
If the concrete is chalky, friable, cracked or showing signs of contamination, address the surface condition first. Primer is designed to prepare a sound substrate, not disguise an unsound one.
Fibreglass pools
Fibreglass is non-porous and generally needs a different approach from concrete. The key is usually thorough cleaning, removal of contaminants and mechanical abrasion to create an appropriate surface profile for the coating system.
Do not assume a masonry primer is suitable for fibreglass simply because it is sold for pools. The primer and pool paint must be specified as compatible with fibreglass. Where a primer is required, it should be part of the recommended system rather than an improvised extra layer.
Previously painted pools
A previously painted pool needs the closest inspection because the existing coating determines much of what can go on top. Find out, where possible, whether the old finish is chlorinated rubber, epoxy, acrylic or another coating type. The new primer and topcoat must be compatible with it.
If the existing coating is sound, clean, well-adhered and compatible with the new system, you may only need cleaning, sanding and the preparation specified for recoating. If it is flaking, soft, chalky, blistered or of unknown type, the job needs more investigation. Applying a new primer over an unstable or incompatible old coating will not create a reliable foundation.
Match the primer to the pool paint system
The most reliable way to choose pool primer is to work backwards from the finish coat. Pool primer, undercoat and topcoat should be treated as one coating system, not as separate purchases.
For example, a two-pack epoxy pool paint requires preparation and any primer that are compatible with an epoxy system. Chlorinated rubber pool paint has its own compatibility requirements. Mixing products across coating types without confirmation can lead to poor adhesion, softening, lifting or an uneven finish.
This matters particularly when repainting. A pool may have been coated years ago with a product that is no longer identifiable, and a quick visual check is rarely enough to confirm compatibility. When the existing finish is unknown, a small test area may help assess adhesion and reaction, but it does not replace the preparation and product advice in the technical documentation.
Use the technical data sheet and safety data sheet for the specific products you are considering. They set out the surface suitability, preparation method, mixing requirements for two-pack products, application guidance and recoat conditions. If the system is unclear, ask for practical product guidance before ordering rather than relying on a general-purpose primer.
Check whether primer is actually required
Primer is often useful, but it is not automatically required for every pool repaint. The right answer depends on the substrate, the existing coating and the pool paint system.
A primer is more likely to be needed when you are coating bare porous concrete or render, where the recommended system calls for a sealing or bonding coat. It may also be required after extensive stripping, repairs or preparation that has exposed areas of substrate.
On a sound, compatible, previously painted pool, the coating specification may instead call for cleaning, sanding and direct recoating. Adding an unnecessary primer can alter the system build, introduce a compatibility issue or add cost and labour without improving the result.
Avoid treating primer as a cure for surface defects. It will not fix active moisture issues, loose paint, structural movement, oily contamination or poorly prepared fibreglass. Those causes need to be dealt with before the coating system begins.
Assess the pool before choosing products
Drain the pool completely before inspecting and coating it, and ensure it is safe to access. Once empty, examine the walls, floor, steps, waterline and fittings in good light. Look for peeling paint, blisters, chalking, staining, rough patches and exposed concrete or fibreglass.
Pay attention to where problems are concentrated. Flaking around the waterline may point to contamination or inadequate preparation. Blisters can indicate an underlying adhesion or moisture issue. Widespread chalking may mean the old finish has weathered beyond a straightforward repaint. These observations help determine whether you are dealing with a routine recoat or a more involved preparation job.
A simple adhesion check can also be useful on existing paint. If sound-looking coating comes away easily during cleaning or sanding, it is not a stable base for a new primer. Remove loose and failing material until you reach a firm surface, then follow the preparation guidance for the exposed substrate.
Preparation decides the result
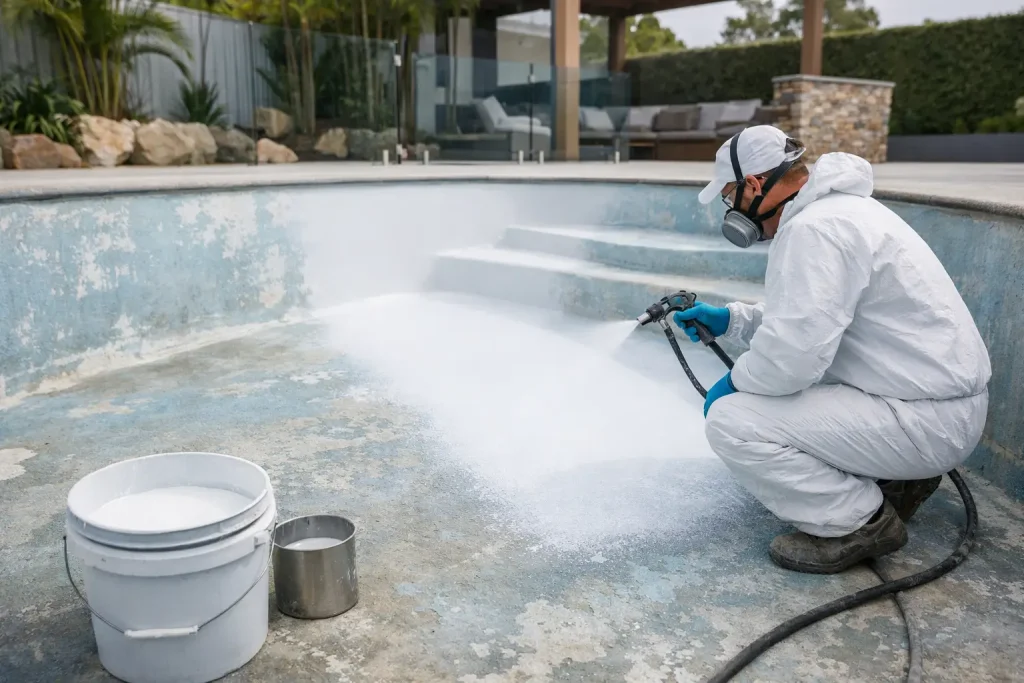
Even the correct pool primer cannot compensate for rushed preparation. Start by removing oils, sunscreen residue, dirt, algae and other contaminants using the cleaning method specified for the coating system. Rinse thoroughly, then allow the surface to dry as required.
Next, remove loose or degraded coating and create the recommended surface profile. Concrete may need a preparation method that opens the surface and removes weak material. Fibreglass and sound painted surfaces often need sanding or abrasion to provide a key. The method, equipment and safety precautions should suit the product instructions and the condition of the pool.
Dust is a common avoidable problem. After sanding or mechanical preparation, remove dust carefully before priming. Dust trapped beneath a coating may reduce adhesion and leave a rough finish. Mask fittings and areas that are not being coated, and only begin once the pool is clean, dry and ready for the full system.
Plan quantities before ordering
Pool primer and paint quantities depend on the area being coated, the pool shape, the substrate and the number of coats required by the product system. Do not estimate solely from the pool’s water volume or assume every pool uses the same amount of primer.
Use the BG Pool Paint Calculator before purchasing. It helps estimate the quantities of pool paint and primer required from your pool dimensions or water volume and existing pool surface. It is a practical way to plan the order, reduce uncertainty and check that you are allowing for the correct coating system.
Keep a small allowance for steps, ledges, deep ends and irregular shapes. Coverage figures are guides based on prepared surfaces, and rough or porous concrete can use more material than a smooth, previously painted pool. Check the product documentation rather than stretching the coating too far to make a quantity last.
Apply within the product conditions
Once you have selected the correct primer, follow its mixing, thinning and application instructions exactly. This is especially important with two-pack products, where the mix ratio, induction requirements where specified, and usable working time all affect the coating.
Choose suitable weather and surface conditions within the product data sheet limits. Avoid applying to a wet surface, during unsuitable temperatures or where rain, dew or contamination could affect the fresh coating. Use the recommended personal protective equipment and provide appropriate ventilation when working in enclosed or partly enclosed areas.
Allow the primer to dry or cure for the stated period before applying the pool paint. Applying the next coat too early or leaving it beyond the stated recoat window can affect the bond between coats.
Make the decision with the whole system in view
The best primer is not simply the one that sounds strongest. It is the one specified for your pool surface and compatible with the paint system you will apply over it. For a bare concrete pool, that may mean a purpose-selected primer. For a sound repaint, it may mean careful cleaning and preparation without an additional priming coat.
Before you commit, confirm the substrate, condition, existing coating type and chosen finish coat. Then use the BG Pool Paint Calculator to plan quantities and refer to the product technical documentation for the final preparation and application requirements. A clear system choice at the start gives you a far better chance of a tidy, dependable pool coating result.